Steps to Set up HTTP Proxies on iOS using Limeproxies?
In this article we will guide you on how to set-up a proxy on your iOS device. Before you proceed with the setup, please make sure you have a running internet connection and you current IP is added in your panel under “Authorized IPs“.
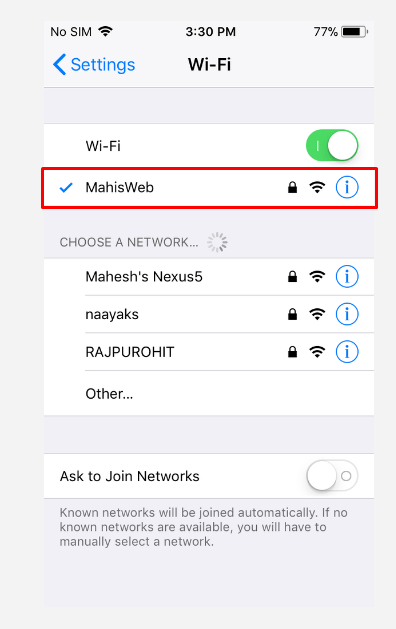
** Step 1** : Click on “Settings”
Step 2 : Connect to a WiFi network and click on the connected network.
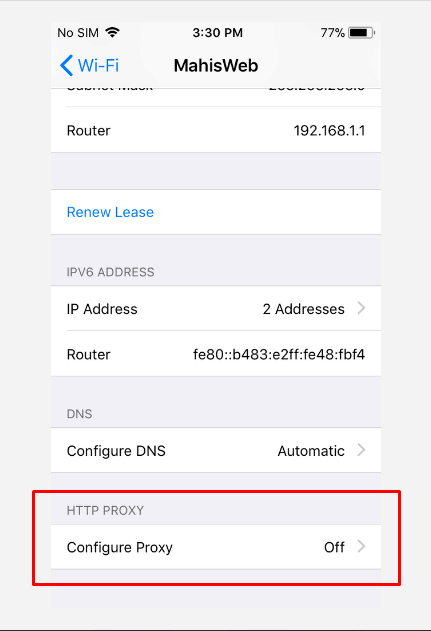
Step 3 : Scroll to the bottom and choose the option “ Configure Proxy “ under HTTP proxy.
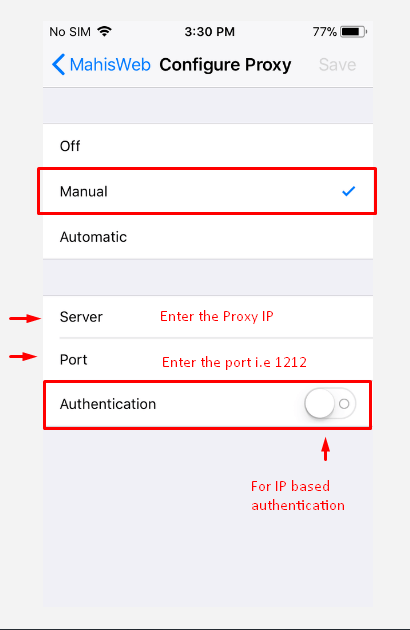
Step 4 : Select the option “ Manual “
Step 5 : Follow steps in the image below for IP based Authentication on proxies and click on “ Save “ once the details are entered..
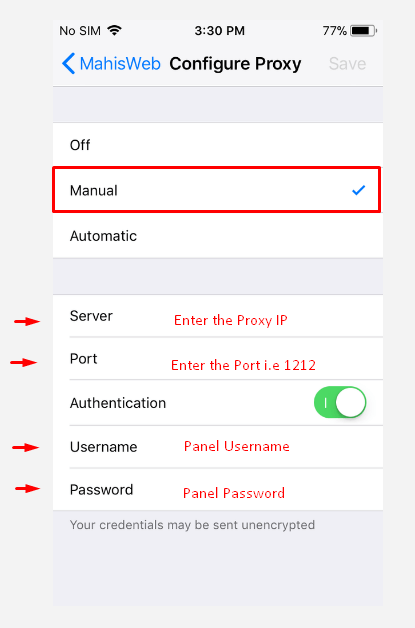
Step 6 : For proxies with Username based Authentication, Please refer the below image and click on “ Save “ once the details are entered.