Using HTTP Proxies In The Chrome Browser With Limeproxies
In this article we will guide you on how to set up a proxy on the Chrome Browser. Before we proceed with the setup, please make sure you have a running internet connection and your current IP is added in your panel under “Authorized IPs”.
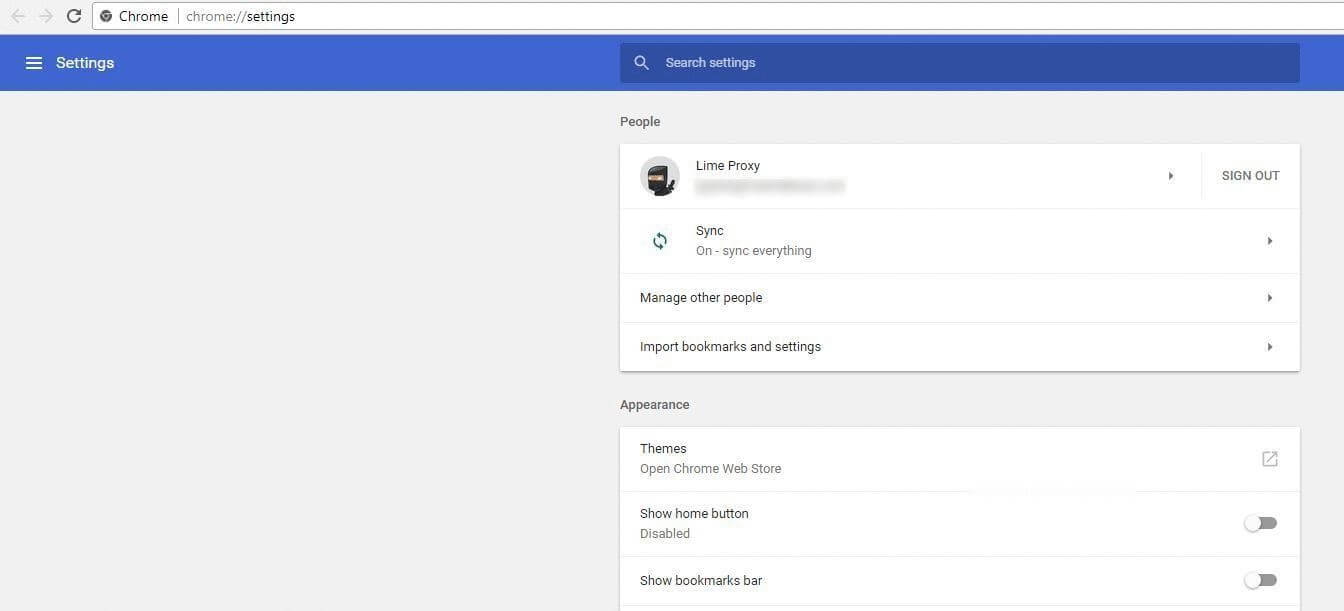
- Open Chrome and navigate to chrome://settings/ (or select Tools > Settings)
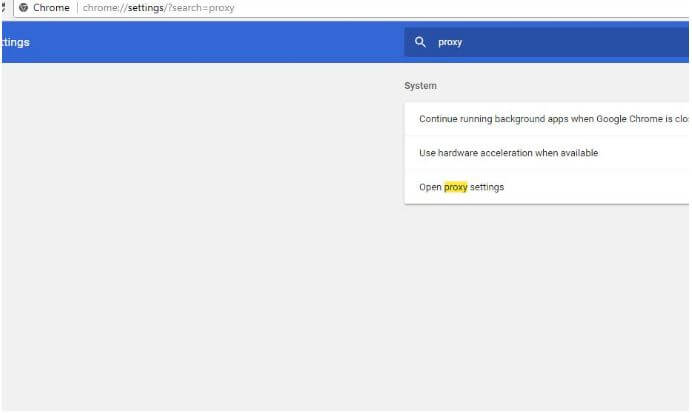
- Search for Proxy and click on “Open Proxy Settings”
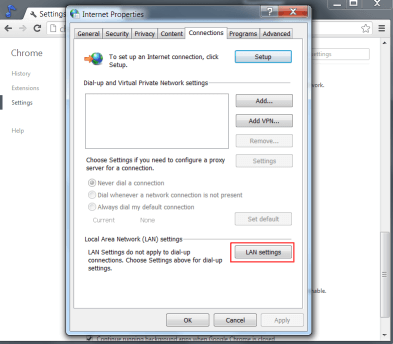
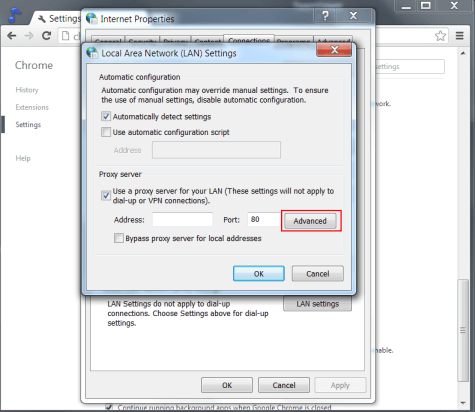
- Within the Connections tab, click LAN Settings
- Check Proxy server, and click Advanced
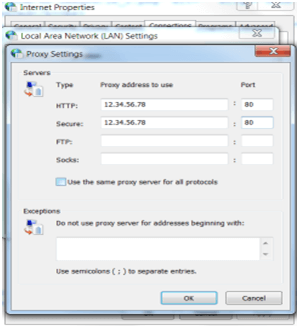
- Enter the proxy IP with port 1212 next to HTTP and Secure: